Steps to Using Your Photos as Windows XP Screen Saver
Windows XP allows you to use your own photos as screensavers. You may choose a folder that contains all the photos that you want to be displayed as screensavers when you are not using your machine. There are lots of options that you can take your pick from to decide on how you want the photos to be displayed. There are several steps that you can follow for using your pictures as screen savers, or you may also take the help of a remote PC support service, if you are not experienced in using computers.
 • Step 1: Right click on an empty spot on your desktop
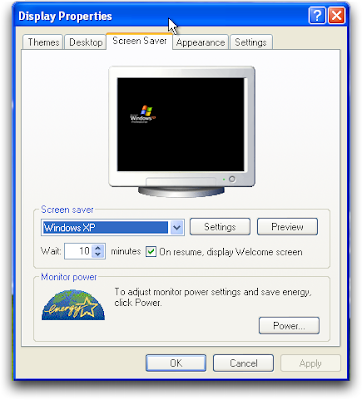
• Step 2: Now choose “Properties” option from the list of options that appear. The “Display Properties” window will be opened
• Step 3: Select the tab that is labeled “Screen Saver”
• Step 4: There will be a dropdown list from which you have to choose the “My Pictures Slideshow” option
• Step 5: Now look for the button that is named “Settings” for opening the screen saver settings
• Step 6: Now click on the “Browse” button and then choose the folder where you have store all your photos
• Step 7: You also have the opportunity to choose from the many options like transition effects, picture changing frequency, and other options
• Step 8: Click on the “OK” button for saving the many changes
These steps should help and if they don’t, then contact an online technical support.
 5:49 AM
 James Madison
, Posted in


0 Response to "Steps to Using Your Photos as Windows XP Screen Saver"
Post a Comment